
Here you can find various tips and tricks for a faster and smoother workflow in Microsoft Word!
Random Text Generation in Your Document
Would you like to add some arbitrary content to your word document?
Microsoft Word has you covered. You can do this effectively utilizing Microsoft tricks and tips.
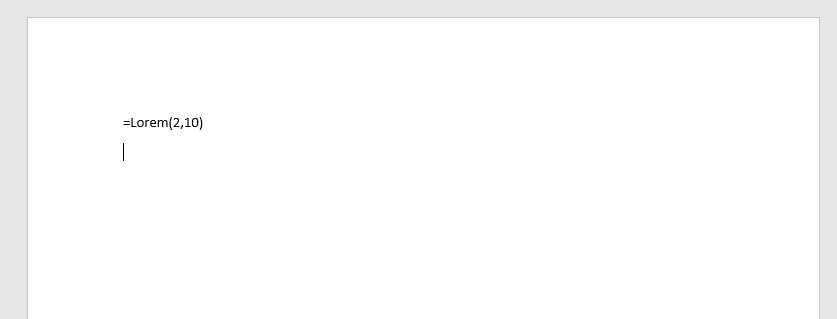
To do this, type: =lorem (P, I); and supplant “P” with the quantity of passages you need, and “I” with the quantity of sentences you need. Whenever you have characterized the variable (P, I), hit enter to create the content.
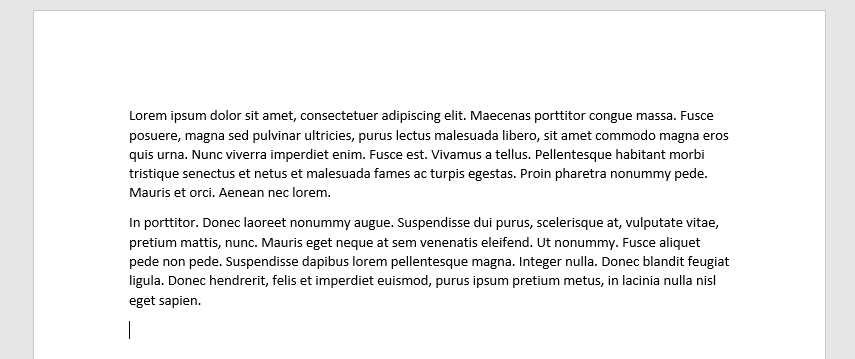
Also, you can utilize arbitrary Office documentation “gobbledygook” as the essential source material for your place filer. To do this, utilization the condition =rand (P, I).
CTRL Key Shortcuts
In Microsoft Word, the CTRL key can be utilized to explore through your document all the more proficiently.
- Hold CTRL and press Right Arrow to go right one word at a time.
- Hold CTRL and press the Left Arrow to go left one word at a time.
- Hold CTRL and Backspace to delete a whole word at a time.
- CTRL + SHIFT + Right Arrow will highlight one word at a time
- CTRL + END to move cursor to the end of the line.
- CTRL + HOME to move cursor to the beginning of the line.
- CTRL + Page Up to move up one page.
- CTRL + Page Down to move down one page.
- CTRL + UP Arrow to move cursor up one paragraph at a time.
- CTRL + Down Arrow to move cursor down one paragraph at a time.
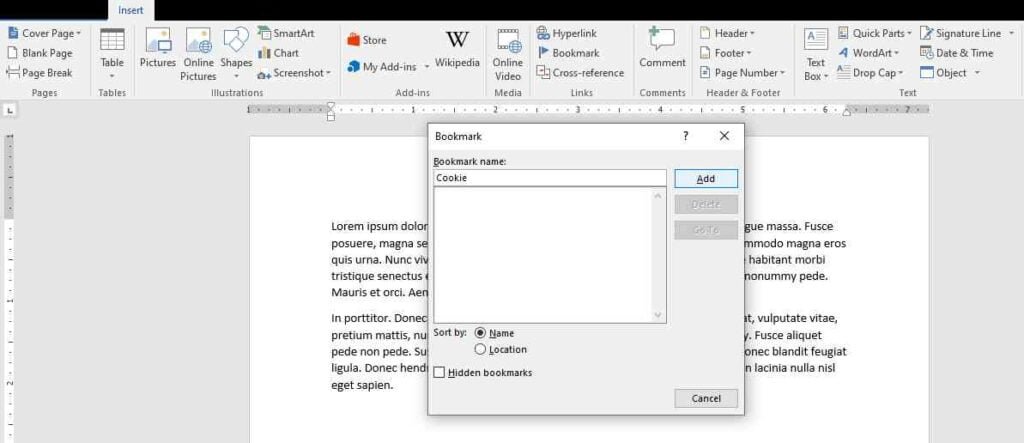
Add Electronic Bookmarks in Your Document
You can easily use Word’s Bookmark command to specify a location in your document. Even though it is invisible, but Word knows where it is.
You can easily use this bookmark to return to a page for editing, to add a cross-reference, or to perform a bunch of other operations.
To Set a bookmark follow these steps:
- Place the insertion pointer where you want to insert the bookmark.
- Click the Insert tab.
- In the Links group, click the Bookmark button.
- The Bookmark dialog box appears.
- Type a name for the bookmark in the Bookmark dialog box.
- Try to keep the bookmark name to one word, letters only.
- Click the Add button.
- The bookmark is created.
To access the bookmark, Press Ctrl+G to open the Find and Replace dialog box, with the Go To tab forward. Choose Bookmark from the Go to What list. Select the bookmark name from the list on the right side of the dialog box. Click the Go To button to visit that bookmark’s location. Click the Close button or tap the Escape key to close the dialog box.

Pin a Folder or a File
Pinning a file or a folder saves a lot of time at work. It allows you to conveniently access the required file or folder in no time.
If you wish to pin your doc here’s how you can do in two easy ways.
Method 1:
Step 1: Click on the File Tab
Step 2: Select Open Option.
Step 3: Under Recent Document you can see the files that you have recently accessed
Step 4: As you place the cursor on the right side, you will find a Pin icon
Step 5: Left click on the icon to pin the file.

Method 2:
Step 1: You can right click on the word icon on the Task bar
Step 2: The list of recently accessed files will be displayed
Step 3: You will find the Pin icon on placing the cursor lightly on the right side of the files
Step 4:left click on the appropriate file you wish to pin. Also you can use this method to pin a folder as well.
Add a Horizontal Line to your Document
You can easily add a horizontal line across your page, extending from the left margin to the right margin. What you have to do is just to type three hyphens (---) and then press Enter !
Get rid of unwanted formatting
The inappropriate or wrong formatting can easily mess up a document, whether you’ve edited it yourself or pasted it in from somewhere else.
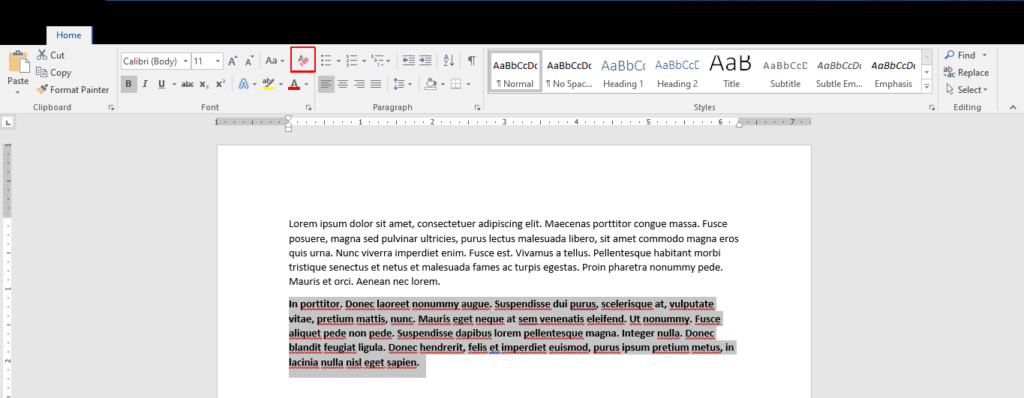
You have to select the text that you want to unformat. Use the key combination Ctrl+Space or click the Clear All Formatting button (an eraser on an A on the Home tab) to remove formatting from highlighted text.
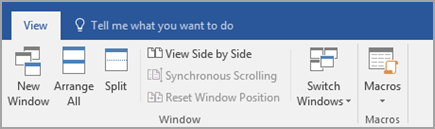
View and compare documents side by side
- Open both of the files that you want to compare.
- On the View tab, in the Window group, click View Side by Side.
Shrink One Page
Sometimes, while finalizing your document; the last page flows over just a few lines to the next page making it look a bit odd. You can easily adjust your document to include those few lines of text without having to print that last extra page. You can use the Shrink One Page feature of Microsoft Word to easily reduce the size and spacing of the text without adversely affecting the overall look and feel of the document.
You need to perform this one-time set up so as to make Shrink One Page icon accessible on the Quick Access Toolbar.
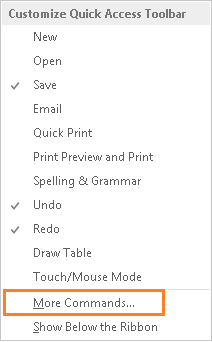
Click on the down arrow on the Quick Access Toolbar.

Select More Commands from the list of options that appears.

In the Word Options dialog box, from the Choose Command From drop-down list, select All Commands.
From the list of commands, scroll down to find and highlight Shrink One Page.
Click the Add button to add the Shrink One Page option to your Quick Access Toolbar.
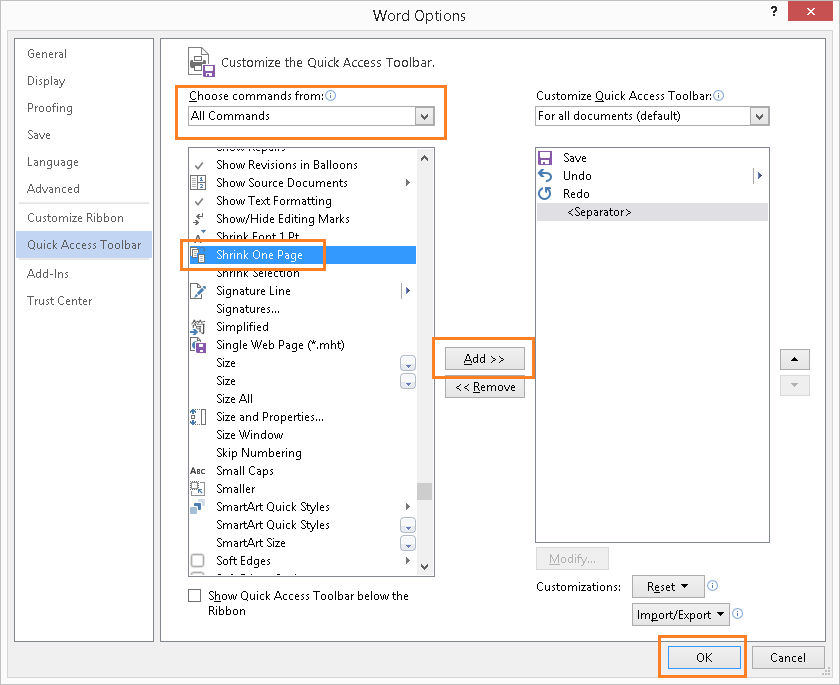
Click OK to close the dialog box.
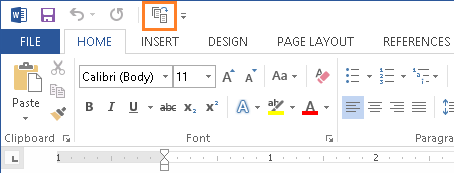
The Shrink One Page option is now accessible through your quick access toolbar. To use this feature, simply follow these steps:
Highlight all the text in your Microsoft Word document (you can press CTRL + A)
Then click on the Shrink One Page icon, as illustrated below.
Insert Date/Time
Its quite easy to insert the current date and/or time into your document with the Date & Time button.
With the help of this feature, you can define whether to insert the current date only or with the time. You can decide the format of how the date and time should appear. It is quite helpful if you constantly need to add a date or time into your document/ reports.
Before using this feature, you need to make sure that Date and Time icon is available in Quick Access Toolbar.
Click on the down arrow on the Quick Access Toolbar.

Select More Commands from the list of options.
In the Word Options dialog box, from the Choose Command From drop-down list, select All Commands.
From the list of commands, scroll down to find and highlight Date & Time.
Click the Add button to add the Speak option to your Quick Access Toolbar.
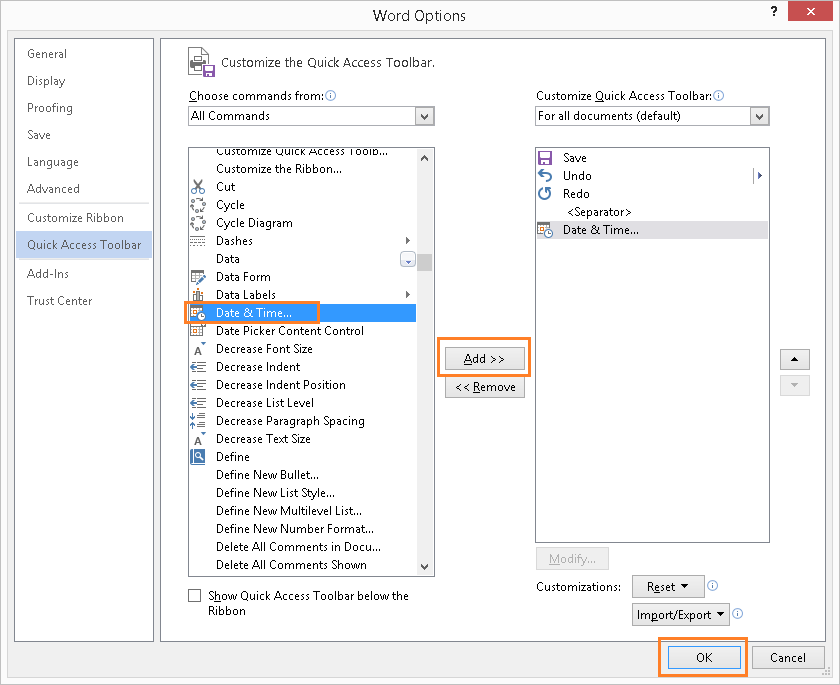
Click OK to close the dialog box.
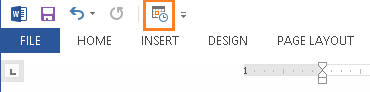
The Date & Time option is now accessible on quick access toolbar. To insert the current date and time into your document, follow these steps:
Position your cursor in the document where you want to insert.
Click on the Date & Time icon, as shown.
From the Date & Time dialog box, select the format on how you want your data/time to appear then click OK.
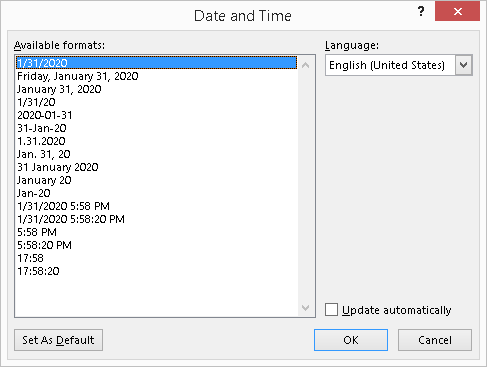
The current data and/or time is now inserted into your document
Cut the text without Regular Cut-Paste Method
You will be surprised to know that there is another way to cut the text and paste it without actually using the Ctrl+X and Ctrl+V shortcut.
1: Select the text you want to cut and Press the F2 key.
2: Place the cursor where you wish to paste the content.
3: Hit the Enter key.
Really, its that simple !


0 Comments